Introduction to Apps in Salesforce
Salesforce apps are tools that help you do specific tasks more efficiently. There are two types of apps in Salesforce: Classic and Lightning. Classic apps are used in the older version of Salesforce called Salesforce Classic, while Lightning apps are used in the newer version called Lightning Experience. Both types of apps can be customized to fit your needs.
Step-by-Step Guide to Creating a New Lightning App in Salesforce
- Navigate to Setup:
- Click on the gear icon in the top-right corner of your Salesforce screen. Select “Setup” from the dropdown menu.
- Access App Manager:
- In the Quick Find box, type “App Manager” and click on it.
- Create a New Lightning App:
- Click on the “New Lightning App” button. This will launch the Lightning App Wizard, which guides you through creating a new app.
- Fill in App Details:
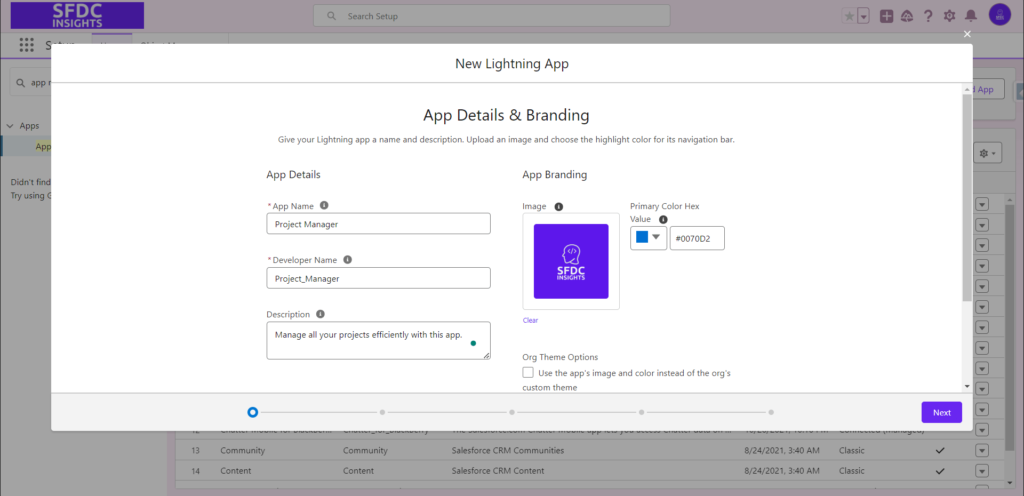
- Provide the necessary information such as the app name, description, and branding details. For this example, let’s name the app “Project Manager”.
- App Name: Project Manager
- Api Name: Project_Manager
- Description: Manage all your projects efficiently with this app.
- Branding: Customize with a logo and colors that match your organization.

- Configure Navigation Style:
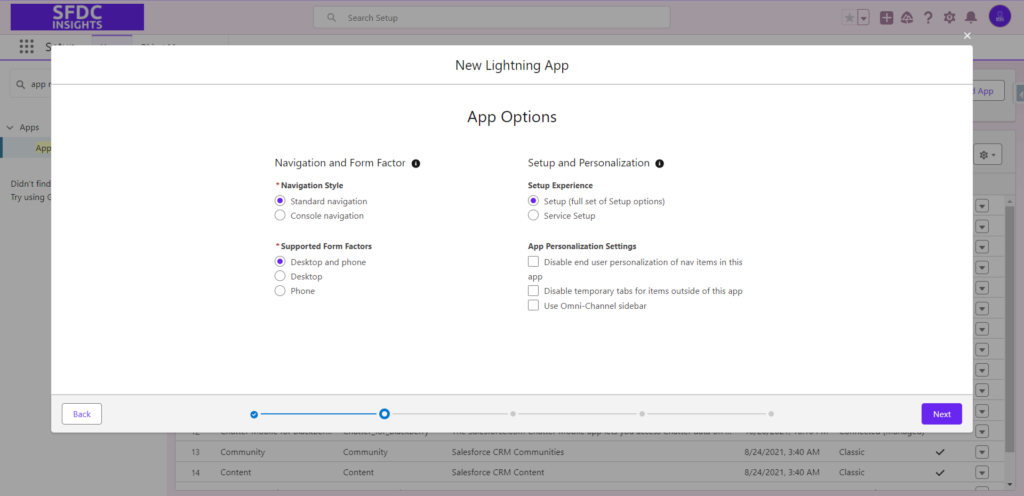
- Choose between Standard or Console Navigation based on your user needs and preferences. Standard Navigation is ideal for simple, straightforward apps, while Console Navigation is suited for apps that require handling multiple records and tasks simultaneously.

- Select Tabs:
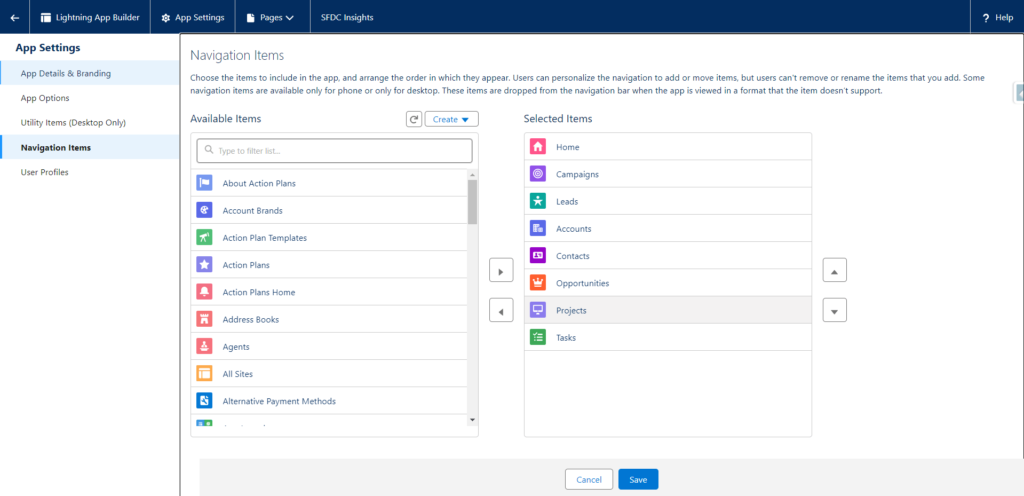
- Choose the tabs you want to include in your app. These could be standard objects, custom objects, or other features relevant to your app’s function. We include some standard objects and the custom object “Project” for this example.

- Add Custom Object Tab:
- If you’ve created a custom object for your blog named “Project”, add it as a tab in your app. The custom object tab will be easily accessible within the app, allowing users to interact with the custom data directly from the app interface.
- Assign User Permissions:
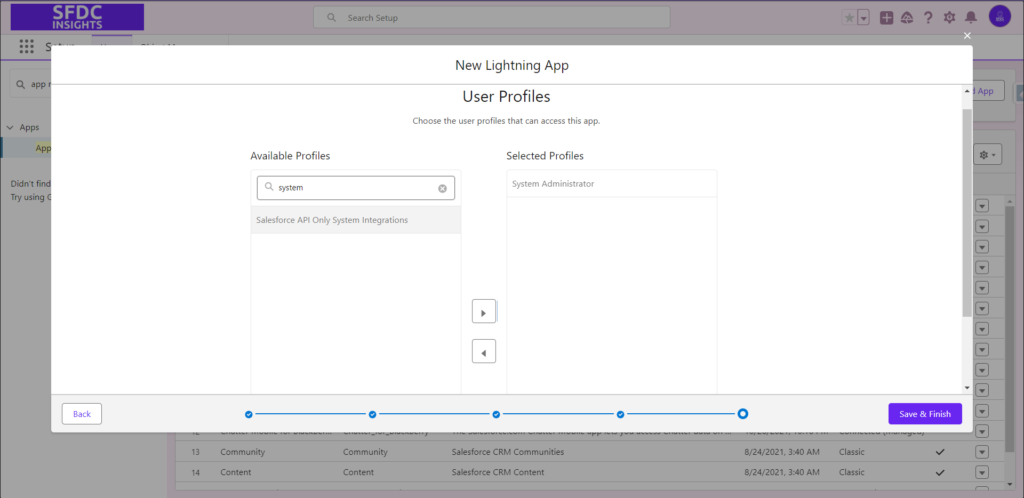
- Specify which users or profiles will have access to this application. Only authorized users will be able to use the app, ensuring that sensitive information is accessible only to those with the appropriate permissions.

- Access Your New App:
- Once the app is created, navigate to the App Launcher (grid icon in the top-left corner) and click on “View All”. You will see the newly created “Project Manager” app listed here. Click on it to start using your new app.
By following these steps, you can create a customized app in Salesforce that enhances the way your users work, boosting efficiency and productivity.


