In Salesforce, Record Types allow you to organize and customize records within the same object based on different business requirements. For example, the Account object might have Record Types such as “Customer” and “Partner,” each displaying different fields, picklist values, or page layouts relevant to their type.
Record Types are a great way to streamline your processes and present different layouts, picklist values, and workflows to users based on the type of record they are working with.
What Are Record Types in Salesforce?
A Record Type is a way to categorize records in a Salesforce object, enabling the display of different page layouts, business processes, and picklist values for different users or use cases. For example, you could have multiple Record Types for Account records, such as “Customer” and “Partner,” and each Record Type might have distinct page layouts, business processes, and picklist values relevant to that type of record.
Key Benefits of Using Record Types:
- Custom Page Layouts: Define different page layouts to display relevant fields for each Record Type.
- Tailored Picklist Values: Choose which picklist values are available based on Record Type.
- Tailored Business Processes: Customize sales stages, case statuses, or approval workflows specific to each Record Type.
- Improved User Experience: Provide a clean, role-based interface where users only see the data and options that apply to their roles.
How to Create and Utilize Record Types for the Account Object
Let’s walk through the steps to create Record Types for the Account object and configure custom picklist values for each Record Type. We’ll work with two Record Types: Customer and Partner.
Step 1: Create a Custom Picklist Field
Before creating the Record Types, let’s first create a custom picklist field on the Account object.
- Navigate to Setup:
- Go to Setup in Salesforce.
- In the Quick Find box, type Object Manager, and select the Account object.
- Create a Picklist Field:
- Under Fields & Relationships, click New Field.
- Select Picklist and click Next.
- Name the field Account Status.
- Enter picklist values such as:
- For Customer accounts: “Active,” “Inactive,” “Prospective.”
- For Partner accounts: “Active Partner,” “Disengaged,” “Onboarding.”
- Click Next, set the field-level security, and then save it.
- Add the Picklist to Page Layouts:
- Add the Account Status field to the page layouts you’ll use for each Record Type (we will do this in the next step).
Step 2: Create Record Types for the Account Object
- Navigate to Record Types:
- In the Account object settings, go to Record Types under the Object Manager section.
- Create the Record Types:
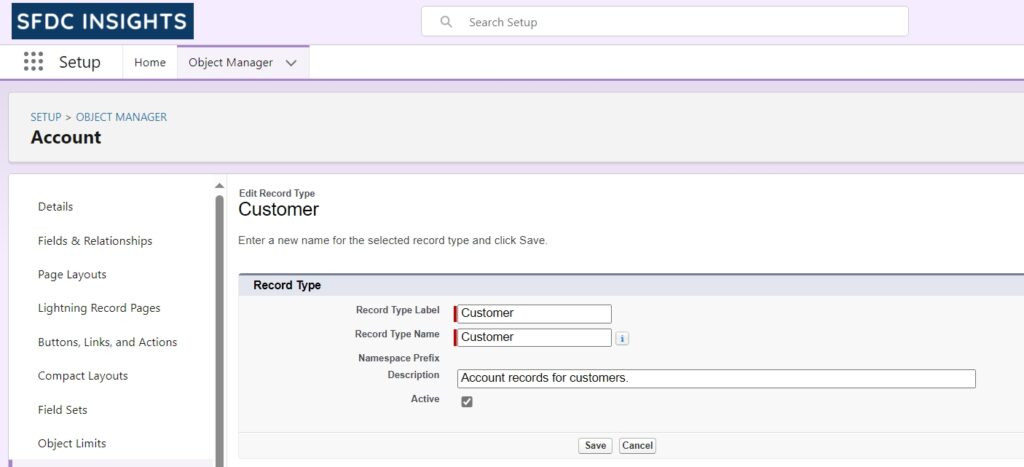
- Click New Record Type.
- Name the first Record Type Customer and provide a description like “Account records for customers.”
- Choose an existing page layout (or create a new one).
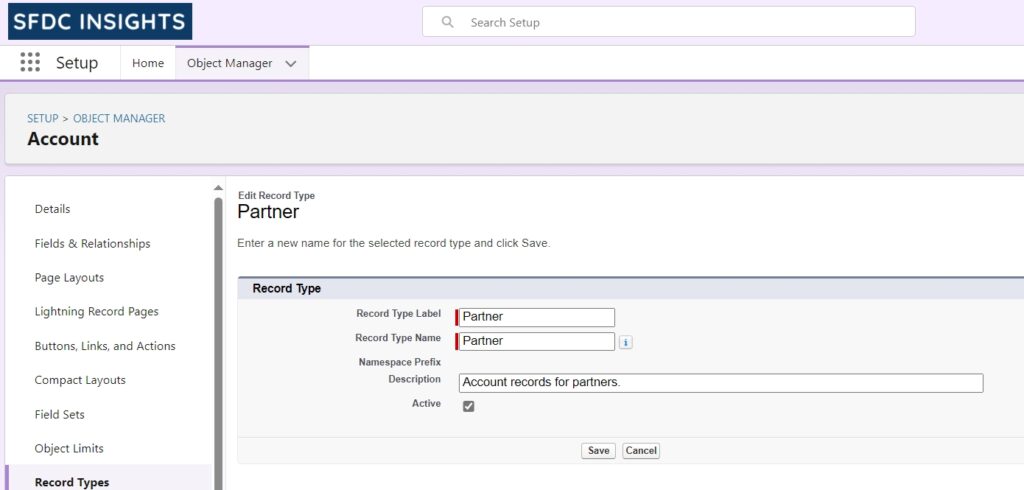
- Repeat the process for the second Record Type, naming it Partner and providing a description like “Account records for partners.”
- Assign Record Types to Profiles (For System Administrator Profile):
- After creating the Record Types, assign them to the System Administrator profile (or the profile you’re using for this tutorial). This ensures only the users with this profile will have access to these Record Types for now.
Step 3: Modify Picklist Values for Each Record Type
Here’s the correct process to modify the available picklist values for each Record Type.
- Navigate to Record Types Settings:
- In the Account object settings, go to Record Types.
- Select the Record Type:
- Choose the Record Type you want to modify (e.g., Customer or Partner).
- Manage Picklist Values for the Selected Record Type:
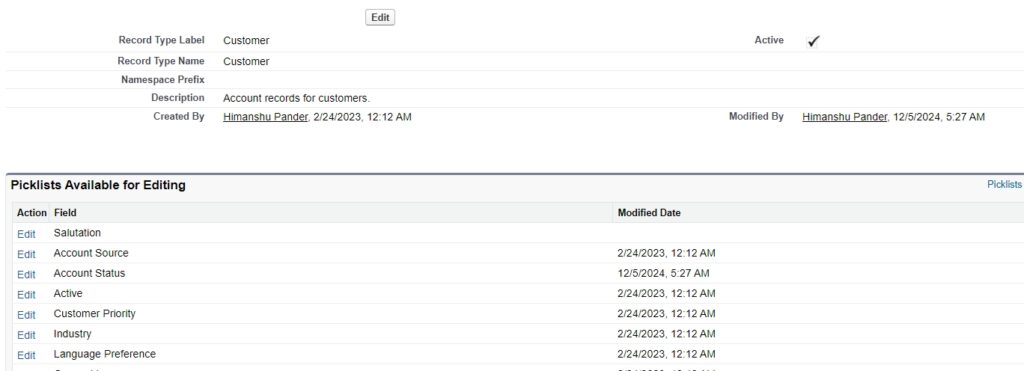
- Below the Record Type details, you will find a section called Picklists Available for Editing.
- In this section, locate the Account Status picklist field that we created earlier.
- Click Edit next to Account Status.
- Assign Values for Each Record Type:
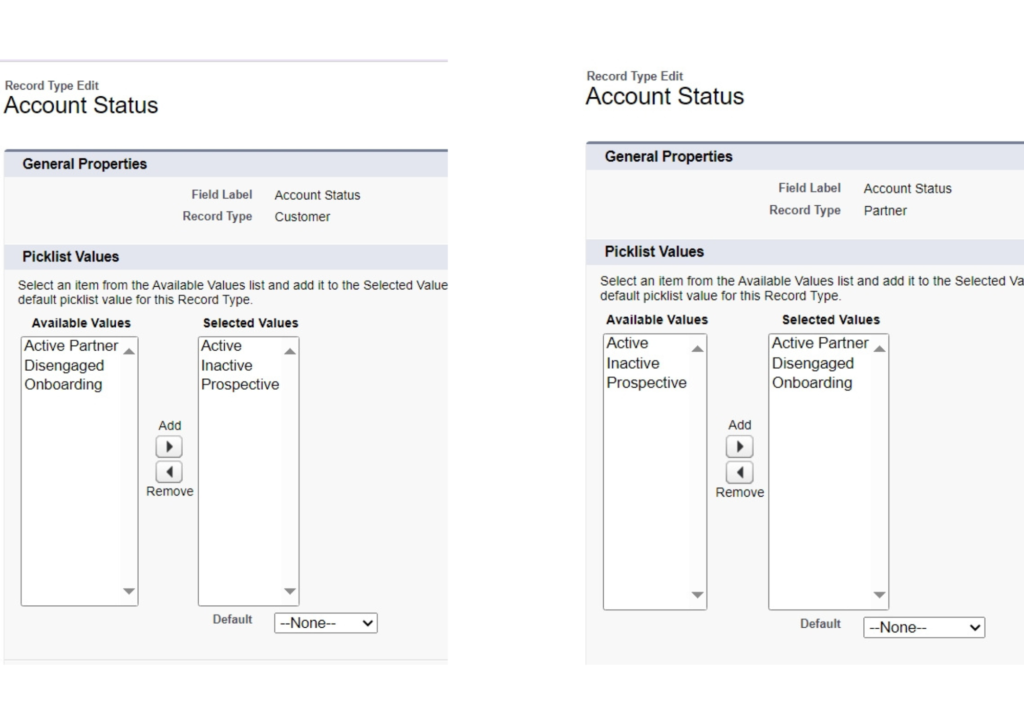
- In the Picklist Values section, you will see the available picklist values.
- For the Customer Record Type, select values like “Active,” “Inactive,” and “Prospective.”
- For the Partner Record Type, select values like “Active Partner,” “Disengaged,” and “Onboarding.”
- Click Save to apply the changes.
This ensures that each Record Type will only display the relevant picklist values for Account Status.
Step 4: Creating Records Using Record Types
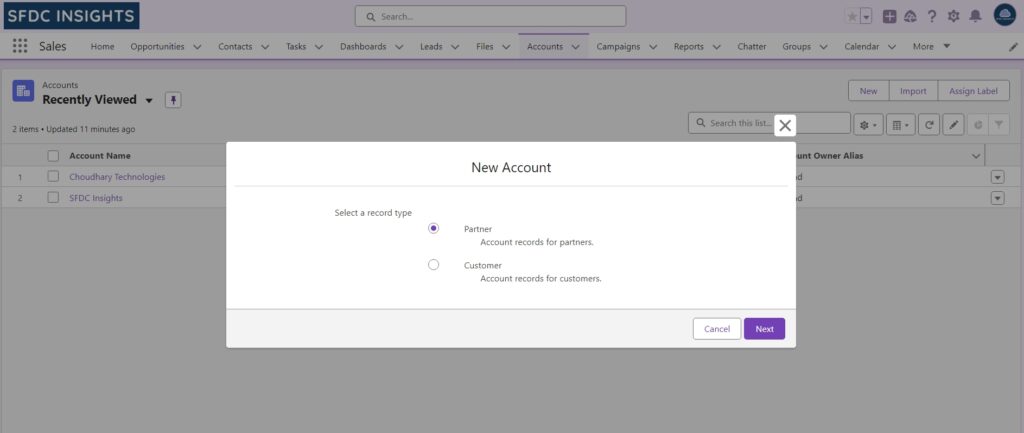
Once the Record Types and related configurations are set, users can create new Account records with specific Record Types.
- Create a New Account:
- When users create a new Account record, they will be prompted to select a Record Type (Customer or Partner).
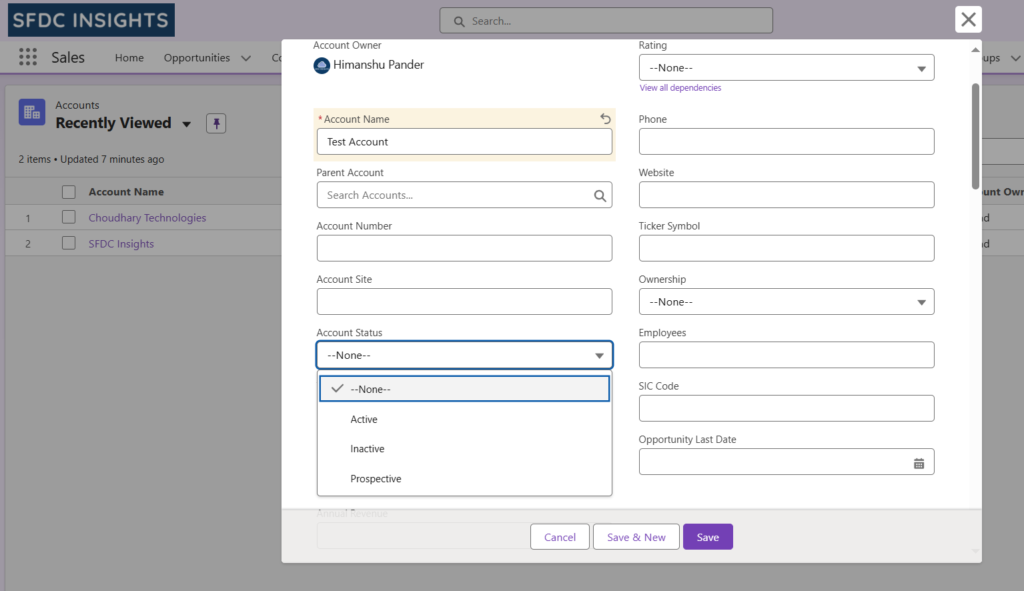
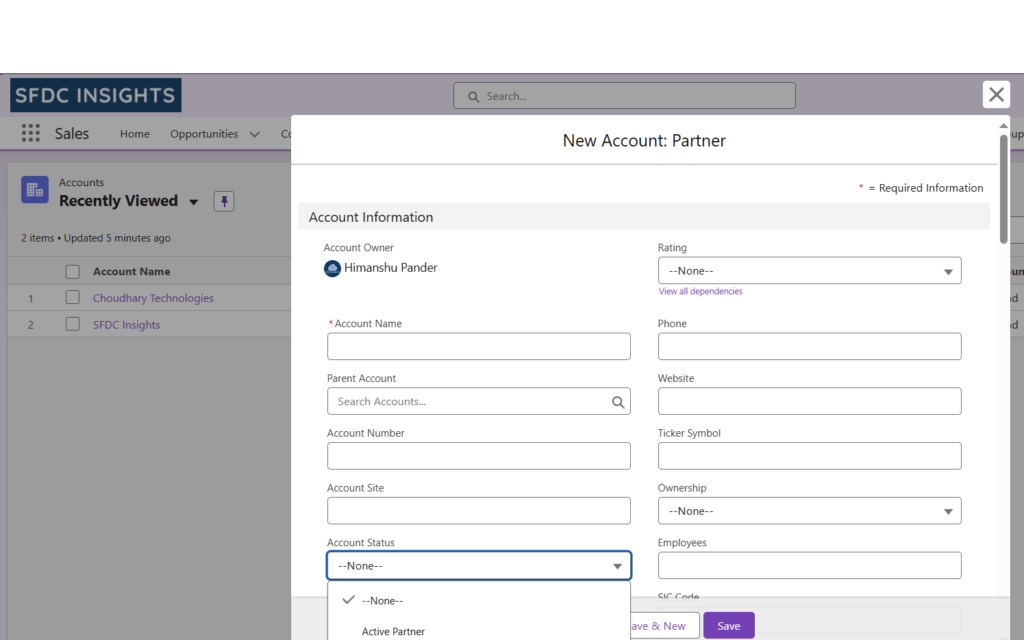
- Picklist Behavior:
- Based on the selected Record Type, only the relevant Account Status values will be displayed:
- For Customer records, values like “Active,” “Inactive,” and “Prospective” will be available.
- For Partner records, values like “Active Partner,” “Disengaged,” and “Onboarding” will be available.
- Based on the selected Record Type, only the relevant Account Status values will be displayed:
Best Practices for Using Record Types:
- Minimize Overcomplication: Keep the number of Record Types manageable. Having too many Record Types can create confusion and lead to a cluttered interface.
- Plan Picklist Values Carefully: Ensure that the picklist values for each Record Type are well-defined and only include values that are relevant to that Record Type.
- Test Thoroughly: Always test Record Types and their corresponding layouts and picklist values in a sandbox or test environment before deploying to production.
- Leverage Profiles and Permission Sets: Use profiles and permission sets to control which users have access to which Record Types, ensuring proper access controls.
Conclusion
Salesforce Record Types are an essential feature for tailoring user experiences, data organization, and business processes. By defining specific Record Types for objects like Account, you can present users with custom layouts, picklist values, and workflows based on their role or department.
Understanding how to create and customize Record Types—along with associating different picklist values for each Record Type—will help ensure that Salesforce is more intuitive and effective for your organization. By using these features, you can improve efficiency and streamline processes for your users.


