Welcome to your new favorite tool for Salesforce development! In this guide, we’ll walk you through setting up Visual Studio Code (VS Code) for Salesforce, including installation, setting up Salesforce CLI, and getting your project up and running. Let’s dive in!
Installing VS Code
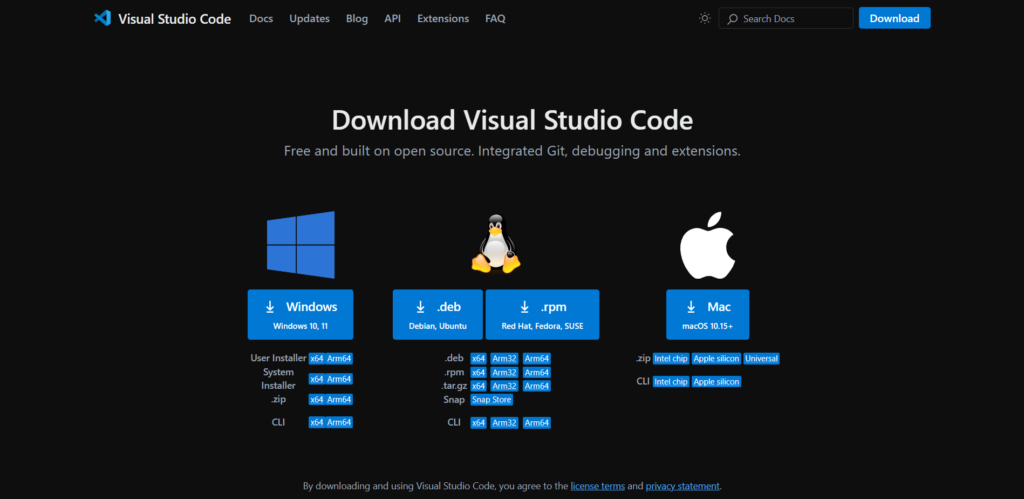
VS Code is a versatile and powerful code editor that’s perfect for Salesforce development. To get started, download and install VS Code for your operating system from this link.
Installation Steps:
- Go to the VS Code download page.
- Choose the version suitable for your operating system.
- Follow the installation prompts to complete the setup.
Installing Salesforce CLI
Salesforce CLI is essential for managing your Salesforce projects directly from the command line. Install it according to your operating system:
- Go To: Download Salesforce CLI
Installation Steps:
- Visit the appropriate download link for your OS.
- Download and run the installer.
- Follow the installation instructions.

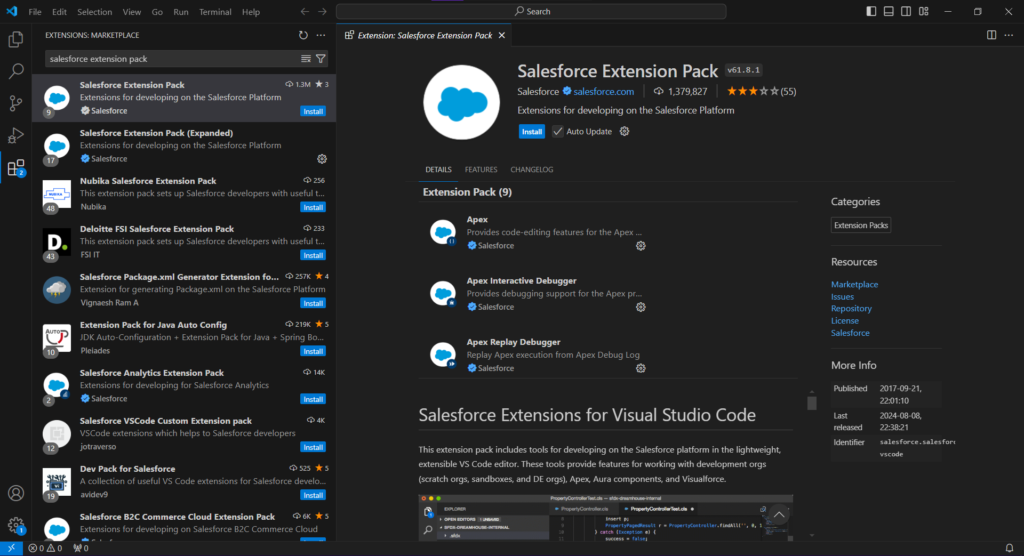
Installing Salesforce Extension Pack in VS Code
Once you have VS Code and Salesforce CLI installed, it’s time to add some Salesforce magic with the Salesforce Extension Pack. This extension pack will make your Salesforce development smoother and more efficient.
To Install:
- Open VS Code.
- Navigate to the Extensions view by clicking on the Extensions icon in the Activity Bar on the side of the window or by pressing Ctrl+Shift+X (Windows/Linux) or Cmd+Shift+X (Mac).
- Search for “Salesforce Extension Pack” in the Extensions Marketplace.
- Click the “Install” button to add it to your VS Code setup.
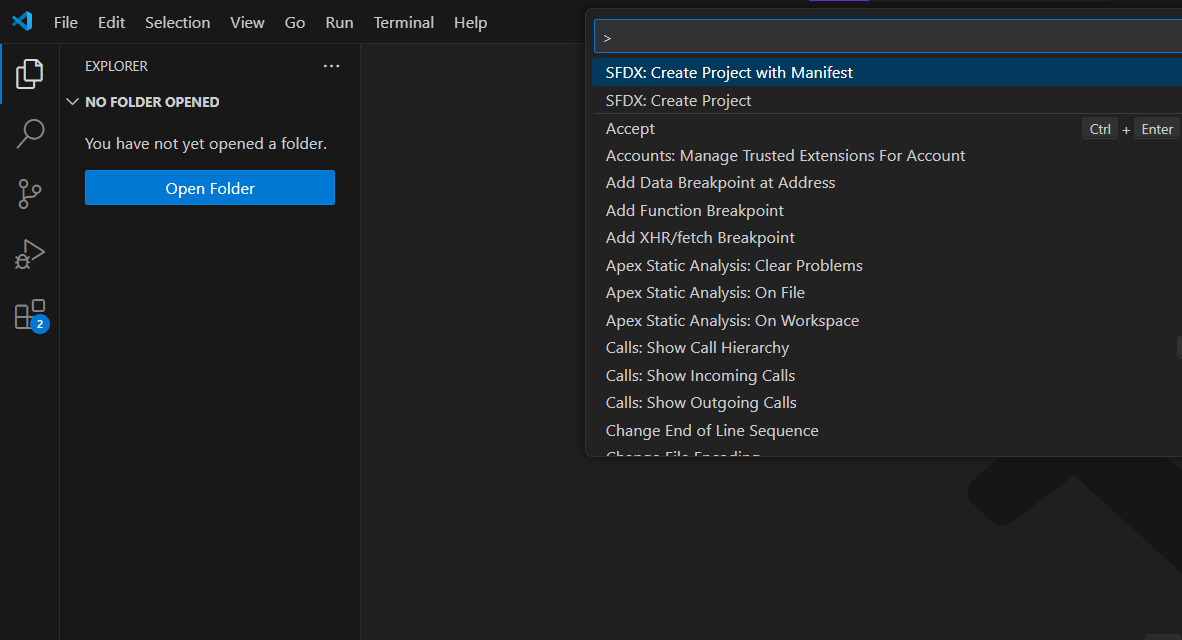
Creating a New Salesforce Project
With VS Code and Salesforce CLI set up, it’s time to create your first Salesforce project.
To Create a New Project:
- Open VS Code.
- Access the Command Palette by pressing Ctrl+Shift+P (Windows/Linux) or Cmd+Shift+P (Mac).
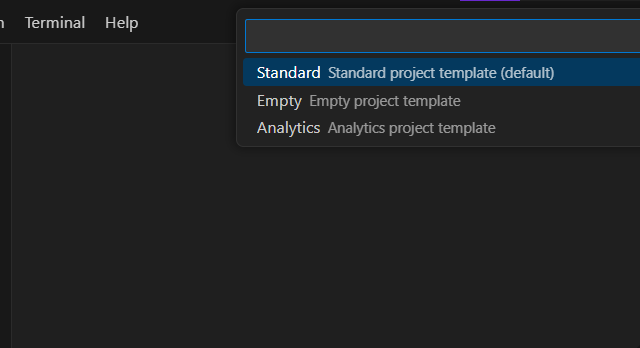
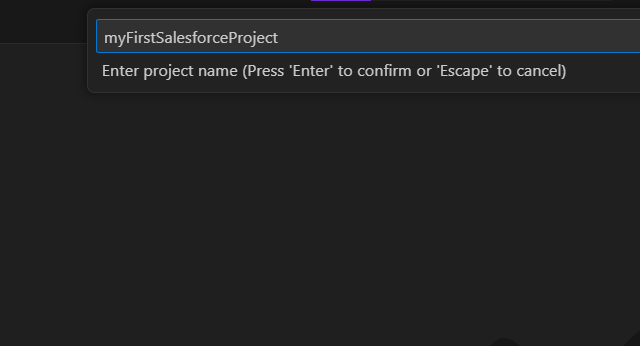
- Type “SFDX: Create Project with Manifest” and select it.
- Enter a name for your project and choose a location to save it.
- VS Code will generate the project structure for you.
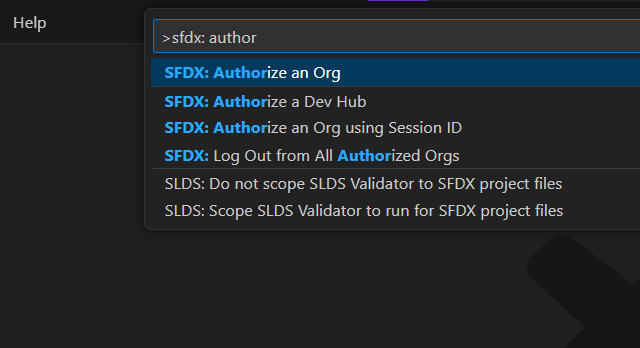
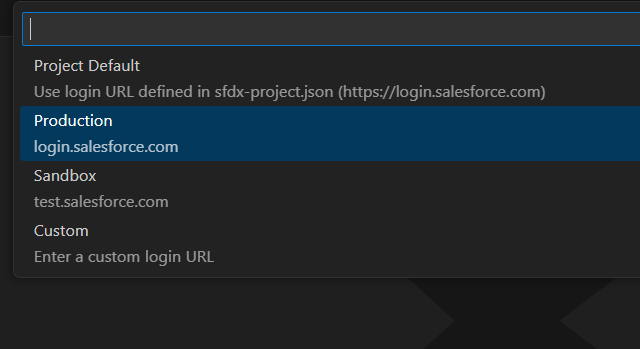
Authorizing Your Salesforce Org
To interact with your Salesforce org, you need to authorize it with Salesforce CLI through the Command Palette.
To Authorize:
- Open VS Code.
- Access the Command Palette by pressing Ctrl+Shift+P (Windows/Linux) or Cmd+Shift+P (Mac).
- Type “SFDX: Authorize an Org” and select it.
- Choose “Login to Sandbox” or “Login to Production” based on your Salesforce environment.
- Give the Alias name for your Org you will use in your Project.
- Follow the prompts to log in to your Salesforce org via the open browser window..
Conclusion
And there you have it! Your VS Code is now set up for Salesforce development, and you’re ready to start coding. With the Salesforce CLI and Extension Pack, you’ll have everything you need to manage your Salesforce projects efficiently. Happy coding!